It is a tale as old as computers themselves: Someone is working on an important document, probably on a deadline, and something happens, whether accidentally deleting it or some kind of problem with data loss occurs, and the file is gone, seemingly forever. Almost everyone who has used a computer at some point in their lives has run into this problem, and it is never a fun one to deal with. Even with Macs, it can happen where files will disappear and there appears to be no way to recover deleted files Mac users thought were safe. Those who aren’t computer experts will often have nowhere to turn except to some kind of expensive service that specialises in recovering deleted files, and those services are often way too expensive for the average person to afford, leaving the user to wallow in their own exasperation.
Believe it or not, though, there are certainly a few things the average person can do to find those files that they thought were gone for good. And even if these suggestions all fail to turn up the missing files, there is definitely something that can help! By following the suggestions that we have put together here, you should be able to perform some kind of data recovery of whatever files you appear to have lost.
If you are using a Mac, then you are most likely familiar with the ever-present bin that appears on the dock, usually in the far right part of it, or bottom if your dock is oriented vertically. Whenever you tell your Mac to delete a file, it always sends the file first to the bin, where it gets out of your way while awaiting permanent deletion. The Bin icon will usually appear full whenever there are any files located within it, but it’s not impossible for some kind of a glitch to happen where it appears empty even though files are present. Regardless of its appearance, the first thing you should do for any deleted file is to open the bin and see exactly what is in it.
If nothing appears in the bin, then don’t start panicking yet. If your missing file was located somewhere other than on your primary hard drive, such as on a separate hard drive, USB flash drive, or SD card, then chances are that it might not be in the primary bin. Each separate drive on a Mac will have its own bin, which is usually not immediately accessible to the user, but it’s there nonetheless. To find the bin for a particular drive, open the main directory of that drive, and then press the Shift, Command and "." (period) keys at the same time to display hidden files. You’ll then probably notice several folders and files that appear with the file names all starting with a period. You should notice one of them named ".Trashes", which is the location of the bin for that particular drive. Check inside that folder to see if your missing files happen to appear there.
Speaking of hidden files, it is not impossible for the files you are missing to have just become invisible instead of actually being deleted. This is because sometimes when errors occur on a computer, they can change the properties of a file accidentally, something which actually happens fairly often in MacOS. To see if this is the case, open the folder where your files were residing and then use the same key combination (Shift, Command, and “.”) to display the hidden files and see if your missing files happen to show up there.
One of the great things about MacOS is that it makes it quite easy to search through your computer and the Internet for virtually anything you need or want. Apple has included several tools that greatly aid users in finding information, such as the Spotlight search tool as well as Siri, the voice assistant that any iPhone user should be familiar with. Although you can search for your files through Siri, it might be better to use Spotlight, as you can search for the exact file name much easier that way. To do this, click on the small magnifying glass icon in the upper right corner of the screen, which should open a Spotlight Search box. Type in the file name into that box, and a list of files that share the same words in the name should appear underneath. It is best to type the exact file name if you remember it, but if not, this is still a handy way to search for files that you can’t find.
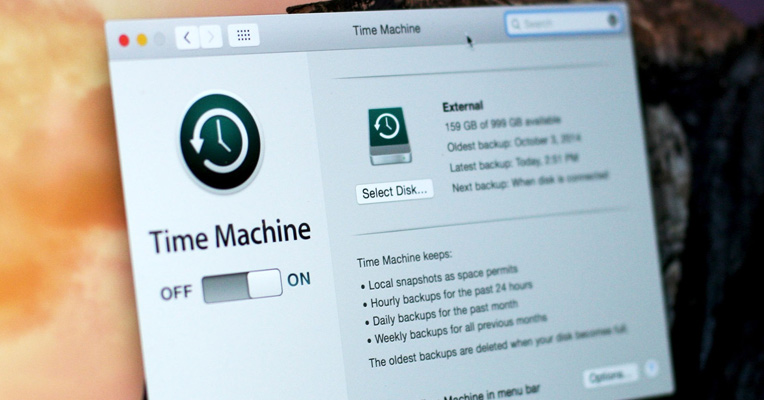
We all know you can’t literally travel back in time, but with your Mac, it is certainly possible to have your files travel back in time with Time Machine. This program makes it extremely easy for Mac users to create back-ups of all of their important files, and if you set up Time Machine in the past to do so, then you shouldn’t have anything to worry about when it comes to missing or deleted files.
To check for your missing files in the past, open up the Time Machine application, which should bring up a screen showing the backed-up files. Flip through each screen until you find the last day where you remember still having your missing files, and then click the Restore button. This will restore your backed-up files to the point in time where they were last found. If you want to do this only for the deleted files, make sure you select those files before clicking on Restore, otherwise, it will restore all of your files from that point in time, essentially erasing any work you have done since then.
Regardless of whether or not Time Machine works in helping to restore your missing or deleted files, anyone who isn’t already doing so should set up this program to perform regular back-ups of their important documents moving forward. Although it is not necessary to use one, it is often recommended that you use the best external hard drives for the purpose of keeping your backups. If you are using a MacBook of any type, then you may want to look for the best portable hard drives for this purpose. This way, any backups performed won’t be lost should you experience a hardware failure.
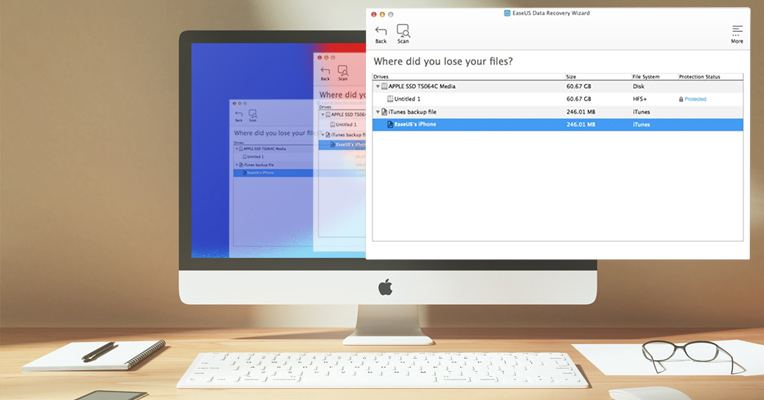
Disaster is always closer than we think. Although all of the above steps are very good suggestions for finding deleted or missing files on your Mac, there are times where none of those steps will be able to recover them. Even in such cases, though, there is a tool that is perfect for recovering deleted files - the EaseUS Data Recover Wizard for Mac. This tool is created specifically for Macs, and it works wonders in recovering lost or deleted files that have gone missing for any number of reasons. You can recover files of all types from virtually any type of storage device, and do all of this in just three easy steps that anyone can follow. Best of all, though, is that you can do all of this for free! Let’s take a closer look at the features of this program to help you decide if this utility is the right one for your needs.
Files will come in many different types and sizes, depending on what kind of data they contain. Many people will have files of all different types on their Mac, including documents made with popular word processing or spreadsheet programs, photos and videos that they have taken of their loved ones, music files of their favourite tunes, and much more. No matter what kind of files that you may have accidentally deleted or lost from your Mac. The EaseUS Data Recovery Wizard for Mac can help you restore them to their original condition. The program has native support for more than 1000 types of file formats, so no matter what obscure format your important data may have been saved in, this utility can help save the day.
A great feature of Macs is that they have support for a wide range of different types of data storage media. Most people tend to keep most of their data on their internal hard drive or SSD drive, but it is also common for many Mac users to have multiple types of storage connected to their computers. Even if you’re the type to connect as many types of storage to your Mac as possible, though, the EaseUS Data Recovery Wizard for Mac can rescue your files. Be it your internal hard drive, SSD, external hard drive, USB flash drive, SD cards, or any others, this wizard can find your files and restore them to just the way you left them. In fact, even Windows-formatted drives using the NTFS, exFAT, FAT16, or FAT32 files systems can have their files restored, so there is essentially no limit to its capabilities. What this means for you is that you’re never without hope of recovering those lost files, no matter what storage media you are using.
Data recovery can be a difficult process, even for those expensive professional services that promise to recover any kinds of files in any condition. Fortunately for users of the EaseUS Data Recovery Wizard for Mac, this recovery process takes no more than 3 simple steps. All you need to do is locate the drive where your data was stored, scan the selected drive for any deleted files, and then recover the deleted files. That’s it! Although this program does have more capabilities for inspecting the files and previewing them, the whole process takes just 3 simple steps, so you don’t have to be a computer expert to recover your lost files.
One would normally think that a program with such capabilities would most likely cost a fortune, but for users of the EaseUS Data Recovery Wizard for Mac, that is simply not the case. In fact, there is a free version that you can download if you need to recover just a few files. The free version supports the recovery of up to 2 GB of data, and includes support for all of the file and drive types listed above, so you aren’t missing any capabilities. A paid version is also available for those with heavy data recovery needs, but at a very reasonable price, so no matter how much data you lost, this program can literally save you thousands of dollars, and not to mention the unlimited amount of stress and heartache that data loss can cause.
Just remember though, the sooner you are able to use this program to recover deleted files, the better, as deleted files won’t remain recoverable forever. If you find yourself in desperate need of recovering deleted or missing files, and all of the steps we recommended earlier can’t help you locate them, then download the EaseUS Data Recovery Wizard for Mac today!


